
Tuesday, November 28, 2017
Thursday, October 12, 2017
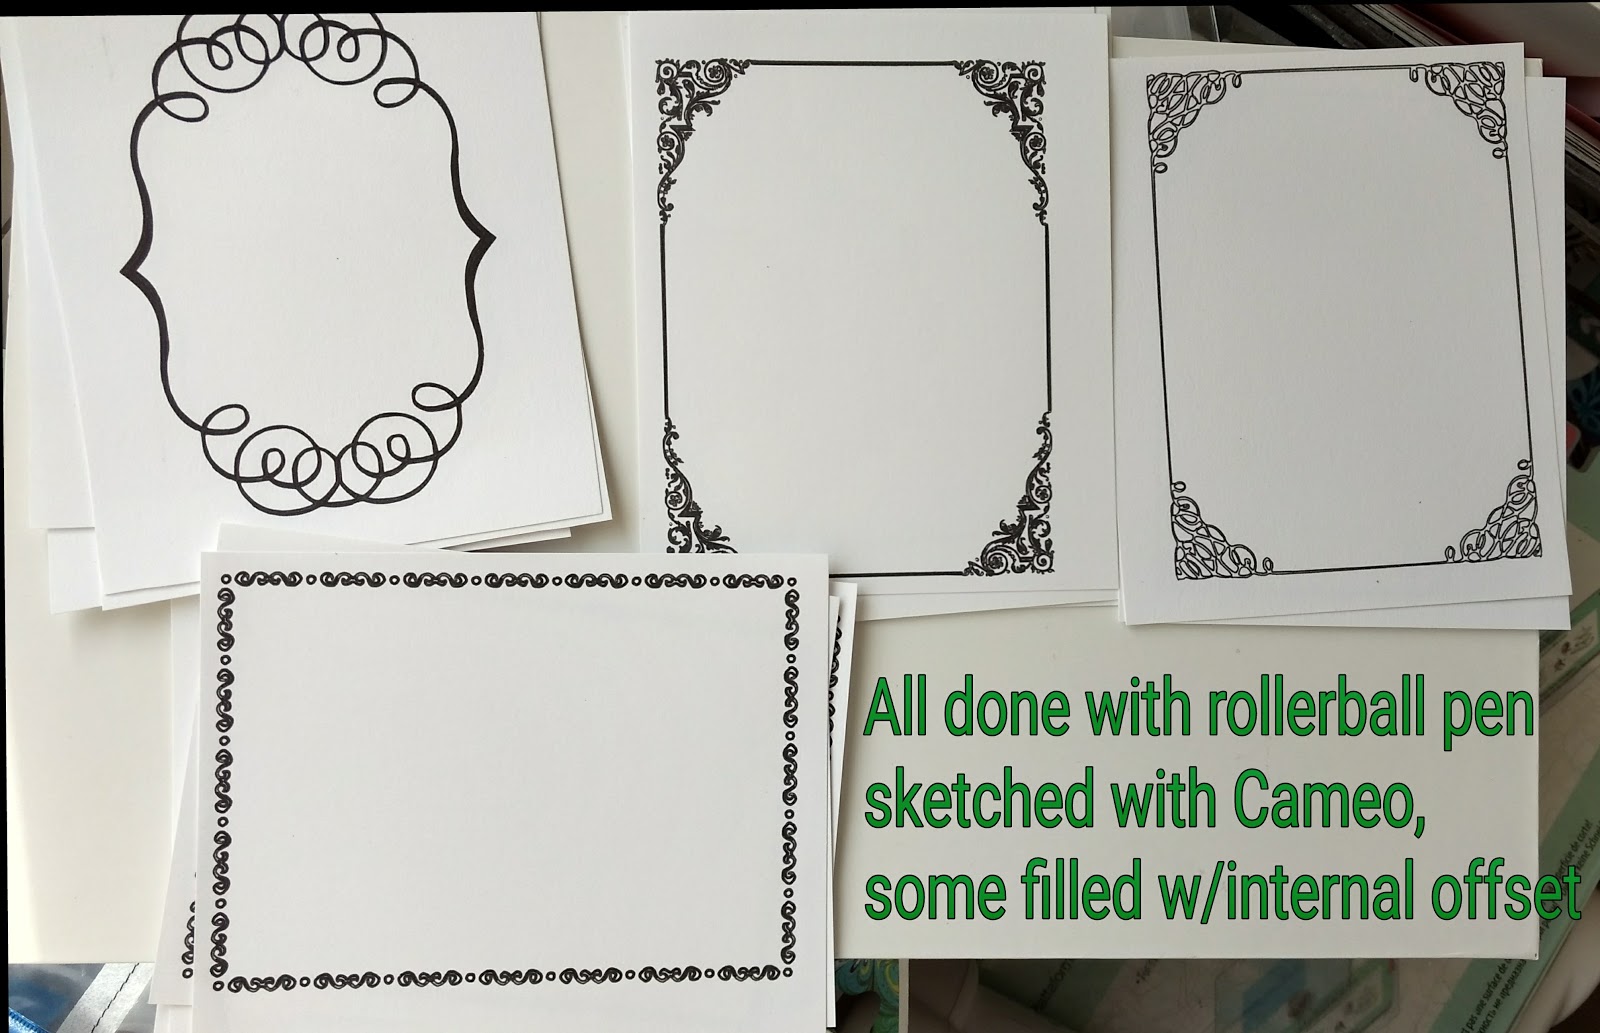
Trying to help those who aren't able to use embossing tool for sketchfill plus tips
I did quick video to show version of software I am using on my Windows 10, laptop, This video recaps the whole process, I also cover tips on the note function, how to cut your sketched images by using "cut by line", also how to quickly edit a cut file to cut by editing points, then welding them so project can be cut out as one, also show you how I save my cut files to make sure they do not disappear some day in cloud. Hope you all can benefit from this. Please let me know if this solves your issue with not being able to use the emboss function to sketchfill.
Thursday, August 10, 2017
Objects on a path, new tool with SS Version 4.1
I show what I learned this morning, easy peasy way to use new tool and fun to play with:
Tuesday, August 01, 2017
Magic color card
So, as it is my friend's birthday, and I just saw a video by Lindsay, the frugal crafter, I decided to make a similar card. I have to admit, I found an image I wanted to use and printed it on cardstock and transparency, also used my Silhouette Studio software to design the various elements, and layout. Also hand colored using watercolors. Here is a video of my card.
Wednesday, July 19, 2017
How I "excercise" my design skills on Silhouette Studio and other tips
Friday, June 30, 2017
Still experimenting with sketching
Although my printer isn't printing, the scanner works, so here are my steps
I slathered ink all over a 12" x 19" sheet of white label paper. I order these label sheets here:
I used a stash of Distress Inks I have and just covered the whole sheet with the ink. Here is a picture:


Then I scanned in that big sheet, I couldn't figure out how to scan it in its entirety, so I did it in sections then grouped them together like a puzzle. I only use this to put on my mat so I can figure out where I want to sketch and cut. Here is a pic of my screen and a butterfly which I had sketchfilled, sketched with a pen, then cut around edge with blade.
 Here is the sheet coming out of the Cameo:


I slathered ink all over a 12" x 19" sheet of white label paper. I order these label sheets here:
I used a stash of Distress Inks I have and just covered the whole sheet with the ink. Here is a picture:


 Here is the sheet coming out of the Cameo:

Then I lifted the sticker off the sheet and placed onto wax paper to use in a project later:


I can now insert that painted label sheet any time I want and place other designs on it to sketch and cut. Very handy to have the scanned version of the sheet for color placement, etc.
After design, getting Cameo to sketch
Following video shows how I get pen ready to sketch, also how to test adjustments so pen will sketch, then included a few missteps in process, so you can see nothing always works perfectly, but you then can see Cameo sketch over a watercolor background. NOTE, when I say PRINT, I really mean SKETCH, no printer used.
Saturday, June 24, 2017
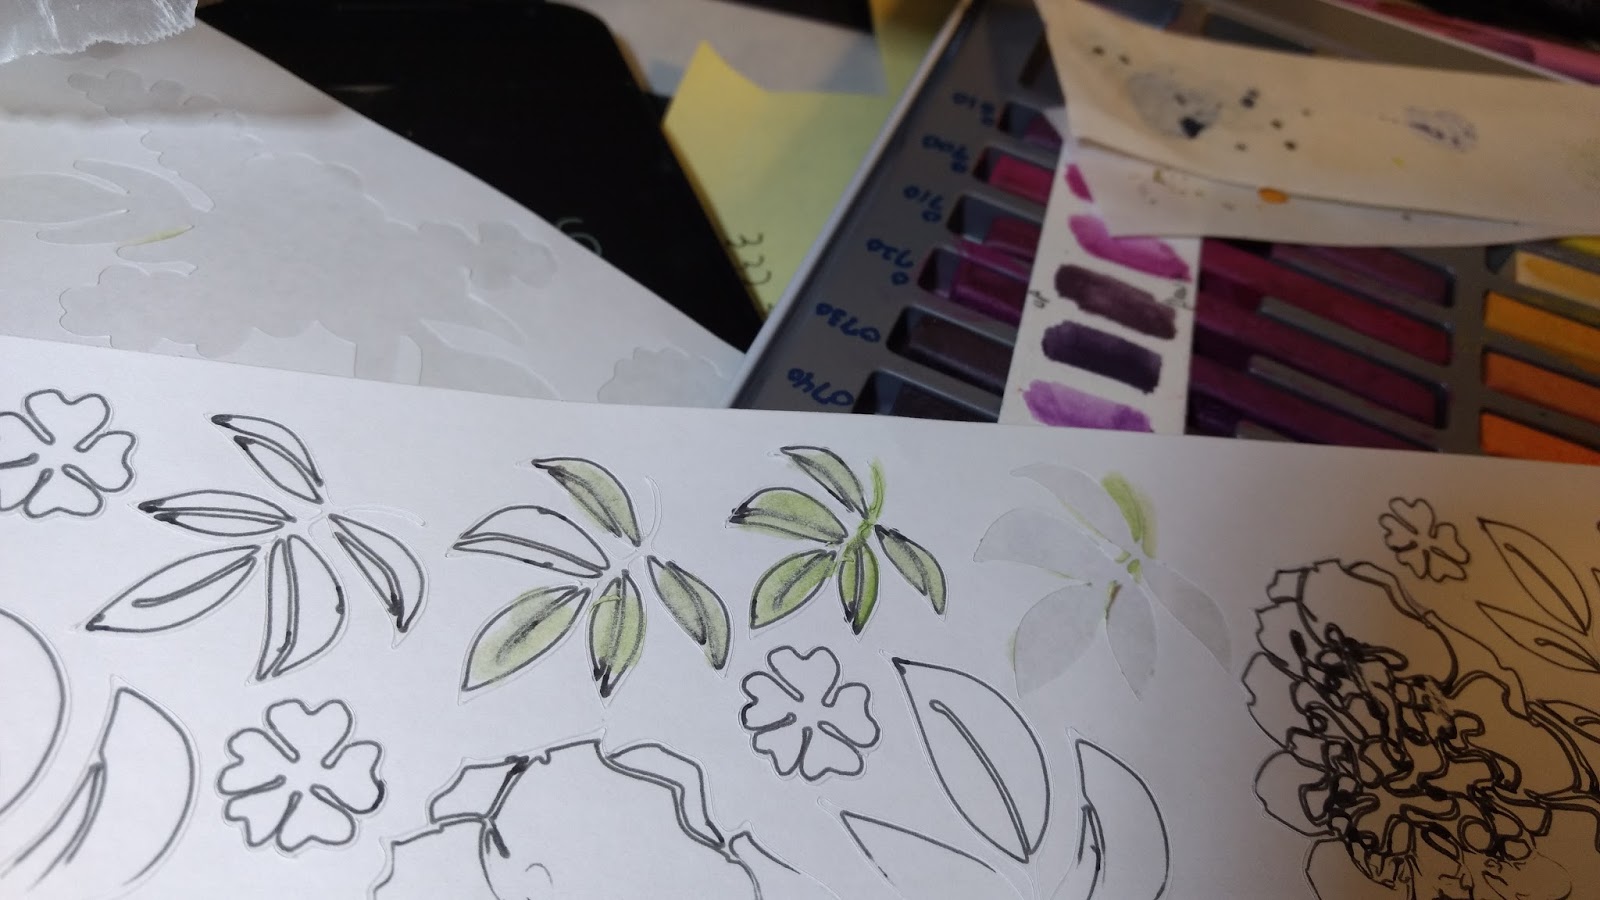
Another Freebie file and pics showing how fill sketch was created
I just sketched out a file I have been working on filling and you might like it. Here is the link
found this image and thought I could do a trace, then fill for sketching:


found this image and thought I could do a trace, then fill for sketching:
Of course, you could print it, but if you wanted to use sketch pen in your Silhouette Studio/Cameo, and get the same "filled in" result, you can.

Here is how design looked on my screen after multiple internal offsets:

This image is a closeup of the fill showing the butterfly, using the fill technique I covered in this post.

and here is how it sketched

If you look closely, there are a few missed spots, it only took a few seconds to fill those in with pen manually, I could have packed another internal offset or two to make it fill with the pen in the Cameo.
Here is a video of the pen in action, sketching this design, ignore the Happy Birthday since that was another experiment trying to get that text as a border for a card.
Well, then I thought, I should use my glitter gel pen to try this again. I had a few adjustments to get the gel pen down far enough to sketch, but not drag, as a result, I sketched it twice before unloading the mat. As you can see, it put down a lot of sparkly color which you cannot get from your printer:


Thursday, June 22, 2017
My Apologies-- Link corrected for Freebie file of filled in Sentiments
Thanks to Trudie Case who called my attention to the link that was empty on the freebie file that should have contained the filled in text sentiments I covered in this blog post:
I have corrected the link so you can now download the file if you want to try it.
I have corrected the link so you can now download the file if you want to try it.
Friday, June 16, 2017
FREEBIE, filled in Sentiments ready for sketching
Yesterday I posted a group of sentiments which I sketched on Vellum, it occurred to me that I could share with you my file for this sketch. For those who do not have a lot of time but would like to try sketching with sentiments I have already filled in using internal offset, you can download this file from dropbox. All you have to do is select your pen of choice and material settings (which really do not matter much in this case), then send to Silhouette. Here is link to the file
https://www.dropbox.com/s/re10w3t2s9hjlar/Sketch%20Sentiments%20on%20Vellum1.studio3?dl=0
Here is how the design file looks up very close on the T in Thank You


https://www.dropbox.com/s/re10w3t2s9hjlar/Sketch%20Sentiments%20on%20Vellum1.studio3?dl=0
Here is how the design file looks up very close on the T in Thank You

When you zoom out, it looks like this:

and here is a picture of the vellum sketch off the mat


I cannot make out the type of pen I used, I think it says "Jetstream" but I am not certain, here are a couple of pics of pen and pen holder I used. Did wrap a bit of blue tape around pen for snug fit before sketching.


Thursday, June 15, 2017
Using sketch plus fill technique on vellum
In my previous posts using pens in Silhouette Cameo, I showed and explained how to fill in fonts using internal offset, which is most like the method you would use to fill in a font or design by hand. I think it creates the best results and is worth the little time it takes to create filled text and images. I am just so pleased to be able to do this.
In the video in last post, I covered Pros and Cons of using the sketch function in lieu of a printer. One of the advantages of being able to do this is using a variety of materials that would not easily go through printer, and you don't need stamps or inks, that are fraught with other challenges, placement and smudging, etc. Regular rollerball, or gel pens and your Cameo are all you need.
We recently got a catalog in the mail with two 5.5" x 11.5" pieces of vellum, One

Friday, June 02, 2017
SKETCHING designs and fonts using internal offset Fill Technique
Again experimenting with "no printer" I have made this video to show you how designs, not just fonts, can be filled in and sketched with pens/markers. At the end of the video I share what I believe the pros and cons of doing this in lieu of printing. I do ask for your patience, still have not figured easy ways to edit. Apologize for all the mouse movements too, I talk with my hands and apparently do same with mouse which is all over the place, need to work on that. At the end, when discussing pros and cons, I mistakenly said something like if you like the cons (meant to say Pros!)
Now see the video where this "filled" veining is sketched onto wax paper painted with a thin coat of paint, one of the pros, it is easy to stick small pieces of material on the mat to work with than to print from your printer, this is where sketching and filling comes in handy.
now for some still camera shots of just some of results I have obtained


Saturday, May 27, 2017
Gold foiling using FRIXION erasable pensketch, quickie glue pen
Finally found a really good crafty use of the erasable characteristics of the FriXion Clicker 07 pen. I used the Silhouette Cameo to sketch happy birthday sentiments on a page of my label paper, Then I used the Quickie glue pen by Sakura, to trace over the sketched text I then let it dry and then applied the foil. The wonderful part about the FriXion pen is that if I missed a part of the Black Ink, that is, I did not completely cover it with the Quickie glue pen it doesn't matter,when it's all finished and the foil has been applied,

I just used the heat gun and the ink that was under the part I traced disappears so all I'm left with is the text that I traced in gold which is exactly what I wanted you can see the process in this video
DIY foiling gel
You might be interested in my experiment, warning, not a very professional video, but you get the message:
Monday, May 15, 2017
More experiments using Frixion erasable pens and markers
Sunday, May 14, 2017
Frixion Clicker 07 erasable gel pen in action and all my observations
Here is more information on these interesting pens, sorry some of the action is out of the frame of the camera, but you get the idea and info
Saturday, May 13, 2017
Create your own Adult Coloring Books/pages
Only better since you will end us with stickers to use on cards, gifts, packaging etc.
Because my printer is not cooperating with me doing Print and Cut, I have found another way, I call Sketch, Cut then Color. I have found it is a lot of fun to color the designs myself with things I have on hand, I use Watercolors, (Derwent Inktense Blocks), but you can use almost any coloring medium, ink, crayons, markers etc. I find the full sheet labels I get from Online Labels take color nicely, you may want to experiment.,

 this was design before I added black accents with a pen. In the video below you can see final image.
This is the erasable pen I used for my last sheet of stickers.


Because my printer is not cooperating with me doing Print and Cut, I have found another way, I call Sketch, Cut then Color. I have found it is a lot of fun to color the designs myself with things I have on hand, I use Watercolors, (Derwent Inktense Blocks), but you can use almost any coloring medium, ink, crayons, markers etc. I find the full sheet labels I get from Online Labels take color nicely, you may want to experiment.,

 this was design before I added black accents with a pen. In the video below you can see final image.
You might want to make up sheets, oh OK, you can use your printer and do regular print and cut if you have a reliable printer, but you don't get to use whole page because of registration marks, but now you have two options, so for the budding artist in your world, pages like these with their favorite images, cartoons, animals, etc. for them to color, then use their art as stickers might make nice gifts,.
Here is last video, I made


These are images I traced, from Hungry Jpeg, Vintage Floral Pack, only $3 and I believe they are having a 20% off sale now.


Subscribe to:
Comments (Atom)