
Tuesday, February 28, 2017
More than one way to .............

Monday, February 27, 2017
Quick tutorial and explanation of how to get rid of black box
Wednesday, February 08, 2017
Digital Flower Arranging in Silhouette Studio for sticker making
I will probably do several of these videos showing how to combine elements to make new images, in this case floral arrangements. Through this process, you learn a lot, most I have included in previous videos, but it is through repetition of the process we get adept at working with the wonderful tools in Silhouette Studio. Hope you enjoy it:
Saturday, February 04, 2017
Faux Quilting in Silhouette Studio using September Bundle
For those of you who purchased the re-release of Hungry JPEG September Bundle, you might be able to play along with me while I demonstrate how to do even more with these images. The September bundle will only be available for a short time and has so many goodies in it. You can use the tips/techniques I cover in this video for many images which you might already have, so have fun:
I quickly reviewed this September bundle last year when it first came out and you can see that posting here:
http://paulinesstuff.blogspot.com/2016/09/hungry-jpeg-september-bundle-and-making.html
Stay tuned for another quick (I hope) video on how to get even more from your images, I will be using the "Pumpkin Season" graphics again from the September Bundle, but wait till you see how I use this image, you won't believe it came from the fall season images when you see it, hint, if you are a cat lover, you might especially love it.
Thursday, February 02, 2017
Free watercolor background Patterns and how to use them in Silhouette Studio
This week Hungry JPEG is offering "free" lovely watercolor background patterns, you can see them here:
I have created a quick video showing how to download, extract (unzip), get them into Silhouette Studio library, and use them for print and cut projects.
Here is a quick pic of them:

I have created a quick video showing how to download, extract (unzip), get them into Silhouette Studio library, and use them for print and cut projects.
Here is a quick pic of them:

Monday, January 30, 2017
Run don't walk to take advantage of this opportunity
I emailed the wonderful folks at Hungry JPEG regarding some of my most favorite and hugely economical bundles that had expired. At the time, they said they could not make them available and I was so disappointed. It often takes me some time when I make a purchase to use the items and be able to post about them in a timely manner. I hate it when the bundles are no longer available when I post how I have used them. I am happy to announce my ALL TIME FAVORITE Mia Charo Bundle is now available here.

I bought it in February 2016 and it is my favorite. It is only $15 and if you like florals, banners, and much, much more you will love this bundle, if you tweet, you can also get 10% more off. Here are the links to my blog postings where I have used graphics from the Mia Charo bundle. In one post I apologized that it was no longer available, BUT now it is for 30+ days.


I bought it in February 2016 and it is my favorite. It is only $15 and if you like florals, banners, and much, much more you will love this bundle, if you tweet, you can also get 10% more off. Here are the links to my blog postings where I have used graphics from the Mia Charo bundle. In one post I apologized that it was no longer available, BUT now it is for 30+ days.
http://paulinesstuff.blogspot.com/2016/07/ready-to-make-more.html
http://paulinesstuff.blogspot.com/2016/07/another-card.html
http://paulinesstuff.blogspot.com/2016/07/another-card-and-another-sticker-sheet.html
I posted about this bundle here: http://paulinesstuff.blogspot.com/2016/09/hungry-jpeg-september-bundle-and-making.html
I will be soon making a video on "Flower arranging in Silhouette Studio" and will use floral elements from these and other bundles. The video will show how to get the graphics onto mat, how to trace, crop to create a nice tight cut graphic, how to get more from each graphic using shader effect tools, and how to combine many elements for a new bouquet, etc. plus lots of tips. Just playing with this flower arranging will show you how much can be done with the software.
Wednesday, January 25, 2017
Stickers made from my pics of pottery items I have made
I don't know why I haven't thought about this before, but this has been fun. I have experienced lots of people pinning my hearts to their Pinterest Boards, so it caused me to go look at them again. My Pinterest Album for these is here.
So I decided to do a video on how I was able to put these images on stickers and thought I would share it with you all.
Here is video I made in creating the stickers:

So I decided to do a video on how I was able to put these images on stickers and thought I would share it with you all.
Here is video I made in creating the stickers:
After printing, I was able to cut on my Cameo, see this video here:
and here are the stickers ready to use:

Tuesday, November 08, 2016


Tuesday, October 04, 2016
Another exciting bundle from Hungry JPEG
I recently purchased two more of the offerings from Hungry JPEG. I have written, in general, many times before, here and here, and here about how wonderful their bundles are, in value and quality. I am sometimes tempted to buy some of the individual offerings, and I do, but the "bundles" are the absolute best bargains ever. Let me talk about the one I am working on now. It is called The Hipster Graphic Pack and is packed with so many wonderful graphics. This package is only $19 and if you have a twitter account and tweet, price drops to $17.10. As explained in my previous posts, if you are from USA, best to pay with paypal directly from your checking account so you don't get caught up in VAT (Value Added Tax) which might get added if you use a credit card. Also, the downloads are very large zip files that need to be extracted. Sometimes, I use a batch processing utility which is a part of a free software program called IRFANVIEW, and I spoke about that in this video and also showed how I trace the images and use the Silhouette Studio software to work with these graphics.
Well, now onto the Hipster Graphic Pack.
Here is a little video (well maybe longer than I intended) looking at the wonderful graphics in this bundle Remember, when you buy these bundles you get complete Commercial License to use in products you make and sell, and the files you purchase are downloadable from their site forever.
Here is the sticker on a card "work in progress" to give you an idea how they look on colored cardstock

Well, now onto the Hipster Graphic Pack.
Here is a little video (well maybe longer than I intended) looking at the wonderful graphics in this bundle Remember, when you buy these bundles you get complete Commercial License to use in products you make and sell, and the files you purchase are downloadable from their site forever.
Here is the sticker on a card "work in progress" to give you an idea how they look on colored cardstock

Wednesday, September 14, 2016
I love my Cameo, sketch with pen and cut on full page labels
Sometimes I am not very happy with the results that I get from my printer when it's printing very fine detailed text, in black on white cardstock. Perhaps it is because I'm using the back feed on my printer, perhaps it's because there is an overspray from the ink in the cartridge.
Rather than trying to figure out and test all of these I recently decided to just combine using a rollerball pen as a sketch function to get the text and frame drawn around the text. What I was trying to do is get labels that I could stick on the backs of my handmade cards and other things I make.
I love using full page labels to make my stickers, See postings here, and here, and here. I get mine from online labels and it's very inexpensive and rather than use the ink in my printer to do this I decided to let the cameo do the work with a rollerball pen. I wrapped a little washi tape and then covered with a foam pen holder (cheapies from Dollar store) which I had cut to fit pen, then inserted into regular cameo blade holder and adjusted so when the mechanism came down, the pen would make its mark. I thought it was amazing that such small text came out so well, better than my printer. The font I used is one I got in one of my old Hungry JPEG bundles, called Azurra Script--
The following pictures show you the results and I am quite happy with them what I did was turn on and off the various elements that I wanted to either sketch with the rollerball pen and then turn those elements to "No Cut" when it finished, IMPORTANT, do not unload the mat! I had a slight offset around the frame that was made "uncut" in the sketching phase, and after that was completed, I set the text and frame to "NoCut" and set the offset line to Cut, and using the Silhouette Settings for white sticker paper, and adding the ratchet blade set at 8, I then "sent to silhouette" (remember, mat was never unloaded), The pictures below show the results


Rather than trying to figure out and test all of these I recently decided to just combine using a rollerball pen as a sketch function to get the text and frame drawn around the text. What I was trying to do is get labels that I could stick on the backs of my handmade cards and other things I make.
I love using full page labels to make my stickers, See postings here, and here, and here. I get mine from online labels and it's very inexpensive and rather than use the ink in my printer to do this I decided to let the cameo do the work with a rollerball pen. I wrapped a little washi tape and then covered with a foam pen holder (cheapies from Dollar store) which I had cut to fit pen, then inserted into regular cameo blade holder and adjusted so when the mechanism came down, the pen would make its mark. I thought it was amazing that such small text came out so well, better than my printer. The font I used is one I got in one of my old Hungry JPEG bundles, called Azurra Script--
The following pictures show you the results and I am quite happy with them what I did was turn on and off the various elements that I wanted to either sketch with the rollerball pen and then turn those elements to "No Cut" when it finished, IMPORTANT, do not unload the mat! I had a slight offset around the frame that was made "uncut" in the sketching phase, and after that was completed, I set the text and frame to "NoCut" and set the offset line to Cut, and using the Silhouette Settings for white sticker paper, and adding the ratchet blade set at 8, I then "sent to silhouette" (remember, mat was never unloaded), The pictures below show the results


Monday, September 05, 2016
Cutting Foam on Silhouette Cameo, whole process from design, setup, cut, taping and separating positive from negative
Several people have asked to see the whole process, I finally managed to get it together to show how I do this. This is the video showing whole process except using stamp which I may do another time.
Thursday, September 01, 2016
Pop up card using stickers
Thanks to Lindsay Weirich's cute stamped pop up card, I decided to try one using stickers, here is my version


Hungry JPEG September Bundle and making stickers from images
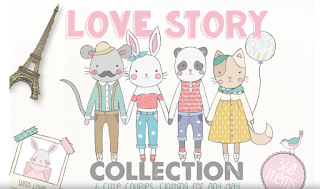
I was not going to get this bundle since I already have all the fonts, but there were some great watercolor images I could definitely use, "and" I know that once the bundle expires, you can't get the benefit from Commercial License & Lifetime Download Guarantee you get when you purchase the bundle. I managed to save 10% by tweeting as is offered on the site, so the cost was only $26.10. I pay with paypal an have payment come directly from checking account. Note if you use a credit card you may have VAT added since this company is in the UK, check before payment to avoid that complication. And did I mention, their "excellent" customer service/response, no matter when I write them an email, I get a quick and very nice response from them.
As I have explained in the past, these images are huge and can be used for posters, etc, really high quality. Here is how I get, process and use these images. As most of you know, I am loving making stickers to use on cards and things, so my processes are geared to that.
1. I download the parts of the bundle to my computer. They come in separate zip files, then I open that zip file, and use the extract routine built into Windows, but I change the "extract to file" to a file I created called "September Bundle" on an external 200 gig SD card and when extracted to that file, I delete the zip file. Remember, with their lifetime download service, you can always get the original package downloaded again any time you want/need.
2. I find that it is easier for me to reduce the size of the images by 50% --does not cause as many crash issues when I use in Silhouette Studio if I do this, could be limitations of my laptop and not the software, but I find the reduced sizes work best for me. I have a "free" downloaded program called IRFANVIEW that works very well for me, you may have other software that easily does this. I create a file under each section of my bundle called 50% and that is where I store the reduced size files.
IRFANVIEW download is here. for Windows 64 bit version, other versions are available Here is a video of how I use the batch processor to easily and quickly accomplish this task.



As I have explained in the past, these images are huge and can be used for posters, etc, really high quality. Here is how I get, process and use these images. As most of you know, I am loving making stickers to use on cards and things, so my processes are geared to that.
1. I download the parts of the bundle to my computer. They come in separate zip files, then I open that zip file, and use the extract routine built into Windows, but I change the "extract to file" to a file I created called "September Bundle" on an external 200 gig SD card and when extracted to that file, I delete the zip file. Remember, with their lifetime download service, you can always get the original package downloaded again any time you want/need.
2. I find that it is easier for me to reduce the size of the images by 50% --does not cause as many crash issues when I use in Silhouette Studio if I do this, could be limitations of my laptop and not the software, but I find the reduced sizes work best for me. I have a "free" downloaded program called IRFANVIEW that works very well for me, you may have other software that easily does this. I create a file under each section of my bundle called 50% and that is where I store the reduced size files.
IRFANVIEW download is here. for Windows 64 bit version, other versions are available Here is a video of how I use the batch processor to easily and quickly accomplish this task.
3. Using images in Silhouette Studio for print and cut/stickers
Now that I have the images reduced by 50%, I am ready to "play" with them. Here is a video that shows how I bring them into the Silhouette Studio software using the "library" function and then how I can trace the image, remove the unwanted white background (even though it won't print), it impedes the ability to squeeze a lot of images on a label sheet for stickers. And lastly, I show how to get more bang for buck when using the image modification tool to get several different looks for each image.
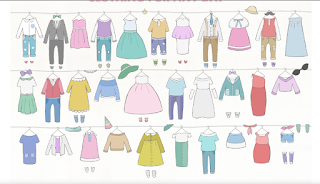
Well that's it for this posting, I might do another follow on one where I do the print and cut on my full label sticker sheets, then maybe some cards, etc that I make with the stickers. There are so many great things in this September Bundle, something for everyone. Wish I had a little one to make these cute dress up characters

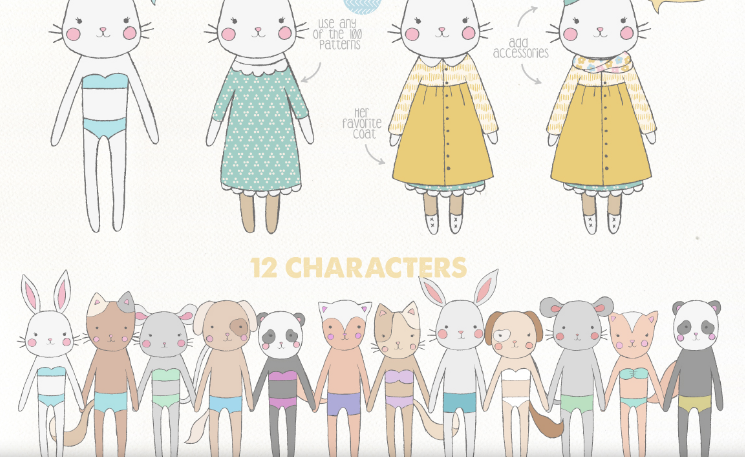


Remember, all this and a whole lot more in the September Bundle here.
Tuesday, August 23, 2016
Monday, August 22, 2016
Foam Cuts using Cameo, now I have even more uses for them as Stamps with MISTI
Cutting foam with my Cameo has been an obsession since I began experimenting with these foam cuts for use with clay/pottery. Because now these very, inexpensive to produce, foam cuts have even more utility if the "positive" can be used easily as stamps, especially with the MISTI. This wonderful tool enables restamping perfectly to get more vivid, bold stamped images (see previous Posting and video on how I do this). I thought I would make it easy for you to crawl through almost 4 years of my experiments with cutting foam by providing direct links to those posts. Before I do, I have this picture to show you how one cut from that Dollar Tree foam can provide two useful products. You can actually use both sides (positive and negative) as stamps (or on gelli plate for those playing with that technique), but if any of you have friends dabbling with pottery/clay, you could give them the parts that create raised images, they will be very excited when they start using them. I have actually sold some to many local potters here.


But as promised, here are all the links to almost 4 years of experiments on cutting and using foam cut with the Silhouette Cameo
http://paulinesstuff.blogspot.com/2014/05/experimenting-and-playing.html
http://paulinesstuff.blogspot.com/2014/04/now-for-square-one.html
http://paulinesstuff.blogspot.com/2014/04/back-to-pottery-and-foam-cuts.html
http://paulinesstuff.blogspot.com/2014/02/finally-putting-it-all-together.html
http://paulinesstuff.blogspot.com/2013/12/still-playing-like-mad-scientist.html
http://paulinesstuff.blogspot.com/2013/11/details-on-how-foam-was-cut-using-cameo.html
http://paulinesstuff.blogspot.com/2013/09/more-foam-cuts-and-impressions-in-clay.html
http://s2.photobucket.com/user/paulinepdm/slideshow/Cameo%20Silhouette%20Digital%20Cutting
http://paulinesstuff.blogspot.com/2013/08/more-photos-made-from-impressing-fun.html
http://paulinesstuff.blogspot.com/2013/08/using-my-cameo-digital-cutting-machine.html
http://paulinesstuff.blogspot.com/2013/08/using-my-cameo-digital-cutting-machine.html
Sunday, August 21, 2016
DIY foam stamps can be easily used with MISTI, here's how
As you know, I love cutting foam with my Silhouette Cameo and have lots of postings on this blog on how I do this, and ways I use them, particularly in my clay work. But I love papercrafting as well and after investing in the MISTI, have come up with ways to turn all those foam cuts (positives) into useable stamps. I have stamped with them before but often you need a second printing of ink to get nice strong images and the MISTI is perfect for getting that look, so I have made a little video showing you how I do this:
I made a disastrous video earlier showing this but the camera app I was using turned everything sideways in the viewer and I was holding my tablet while filming so you could get very dizzy watching it which is why I made the one above. However, I forgot to mention in the one above that I coat the sticky side around the foam stuck to packing tape with powder/cornstarch so it won't stick to paper while tryng to position it before inking, so if you don't mind watching a horribly produced video, you can watch this one too.
Wednesday, July 27, 2016
Ready to make more
Another full 12x18"label sheet with my favorite stickers, have some special requests for these.


Monday, July 25, 2016


Sunday, July 24, 2016
And my Cameo didn't even ask for a raise
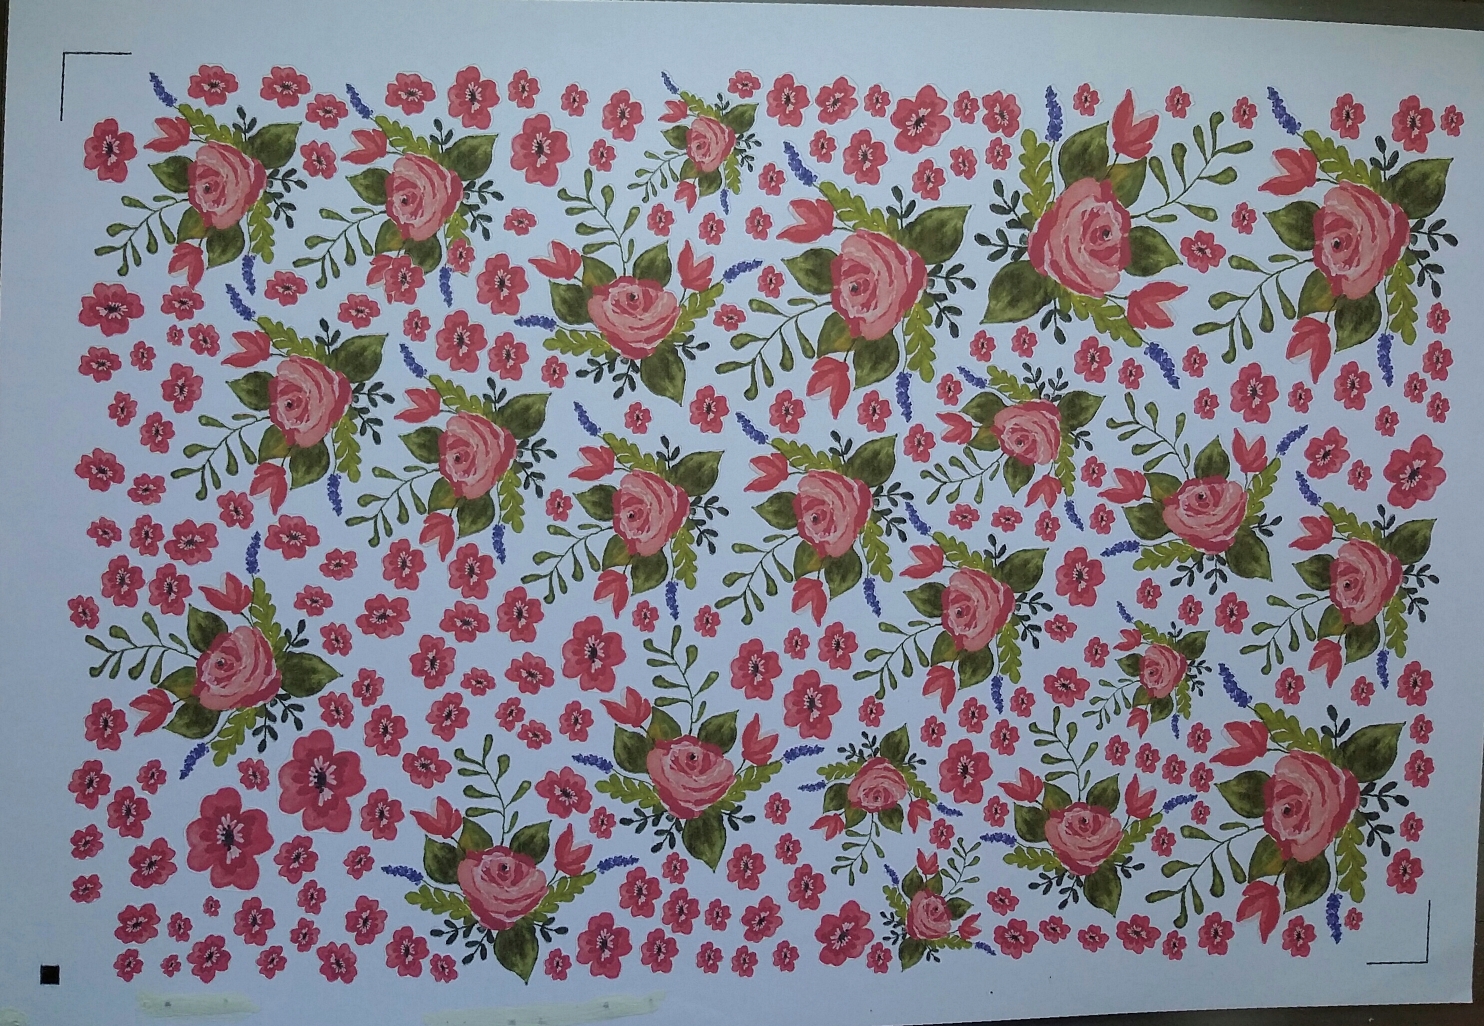
Most I have gotten on a full page sticker label 12"x18", lots of flowers each cut.
I love my Cameo, and my wide format printer. After making this card (included in previous post) which I think is even prettier in person:

I love my Cameo, and my wide format printer. After making this card (included in previous post) which I think is even prettier in person:

I decided I needed lots more of these bouquets and filled the sheet with smaller and medium sized flowers which are nice to include on envelopes and inside card, etc, so I created this huge print and cut and my Cameo just cut every bit out perfectly.
I
Subscribe to:
Posts (Atom)